|
Free 14-Day Evaluations Product Downloads Sign in 
|
| Home >> Documentation >> TinyTERM ITX for Linux >> SSH Settings |
SSH SettingsWith SSH, data transmissions between TinyTERM ITX and the server are encrypted. Even if someone manages to hack into your connection, the information won't be readable. This helps protect your valuable information from unauthorized access. SSH keys provide an additional layer of security for your server. With password access disabled, brute-force attempts to login to the server will fail, as only an authorized key pair will allow a login. SSH Files
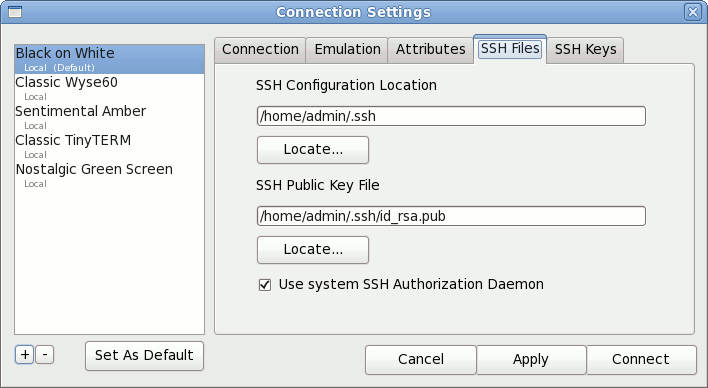
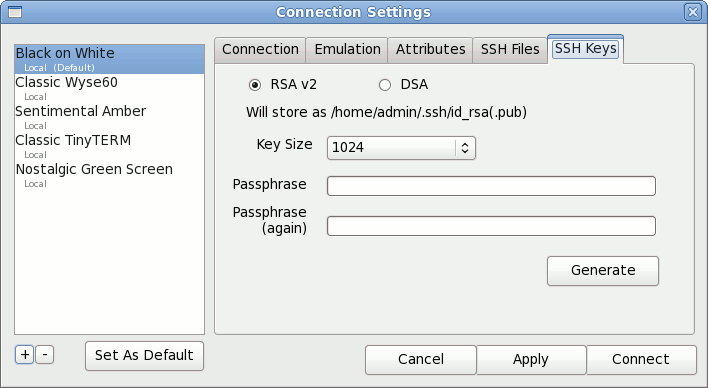
The SSH Files tab allows you to specify an existing SSH Configuration Location and SSH Public Key file already on the Linux system. To select one or the other, click the appropriate Locate button. You can also choose to Use system SSH Authorization Daemon if it is already configured. Key GenerationTo generate a new SSH key pair, go to the SSH Keys tab.
Select either RSA v2 or DSA encryption to match your host requirements. Set the Key Size to the preferred number of bits. The larger the key size, the longer it will take to generate. TinyTERM ITX also requires a Passphrase to be used with the key. This does not need to be an actual password for the server, so it can include spaces, punctuation or any other characters desired. On clicking the Generate button, TinyTERM ITX will generate the keys in the directory specified on the SSH Files tab. Using an SSH KeyAfter the key pair is generated, the public key must be moved to the host system. This can be done via email, file transer program, USB memory stick or any other file copy method available. After copying the public key to the host, it needs to be added to the list of authorized keys. This command is common for an RSA key: cat id_rsa.pub >> ~/.ssh/authorized_keys
Adjust the command as needed to match the file name and host requirements. The private key remains stored in your home .ssh directory. |
| ||||||

